Homelab as Code: Packer + Terraform + Ansible

merox merox #automation#terraform#ansible#proxmox#packer

Automate your homelab from scratch — VM templating with Packer, provisioning with Terraform, and service deployment with Ansible on Proxmox.

Warning

Experimental — not actively maintained. This post documents an older approach from late 2024. The current infrastructure has moved to Talos + FluxCD GitOps for Kubernetes workloads. The Packer + Terraform + Ansible pipeline still works for spinning up standalone Docker VMs on Proxmox, but it’s no longer the primary deploy method and the repo may be behind on dependencies. Treat this as a reference, not a production guide.

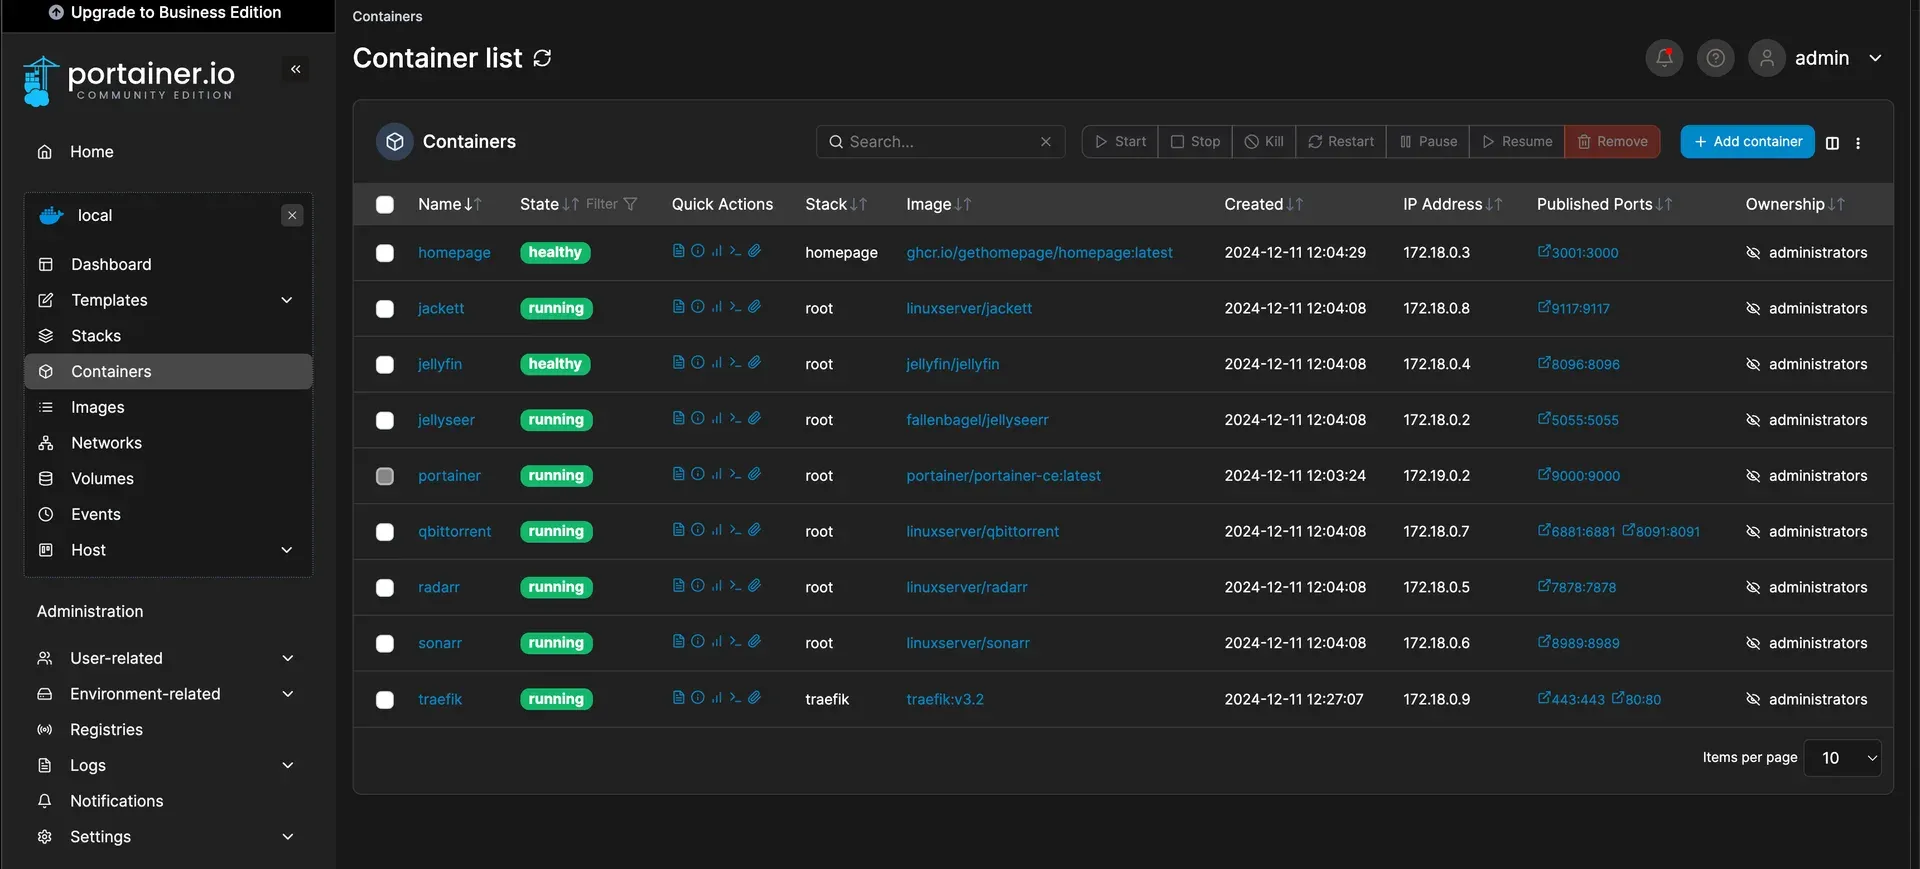
This project automates a full homelab deployment — Packer builds the VM template, Terraform provisions it on Proxmox, and Ansible handles everything inside: Docker, Portainer, Traefik, and optional services like a media stack and Homepage dashboard.

Requirements

Note

This project deploys an Ubuntu VM with Docker, Portainer, Media Stack, Traefik, and more. You’ll need:

  1. Proxmox VE for VM management
  2. A fresh LXC to run the deploy script
  3. A DNS server configured for your service domains

Architecture and Source Code

Homelab Architecture Diagram

Source: meroxdotdev/homelab-as-code

What’s in the Repository

The repo covers everything needed to go from zero to a running VM with services:

  • Deploy script — installs dependencies (git, curl, ansible, packer, terraform), clones the repo, and runs the full pipeline
  • ansible/ — roles for Docker, Portainer, Traefik, and optional NFS mounts
  • configs/docker/ — pre-configured services: Homepage, Traefik, media stack
  • packer/ — builds an optimized Ubuntu template for Proxmox
  • terraform/ — VM provisioning with networking and storage, based on the Packer template

Quick Start

Run this on a clean LXC:

Terminal window
bash -c "$(curl -fsSL https://raw.githubusercontent.com/meroxdotdev/homelab-as-code/refs/heads/master/deploy_homelab.sh)"

What the Script Does

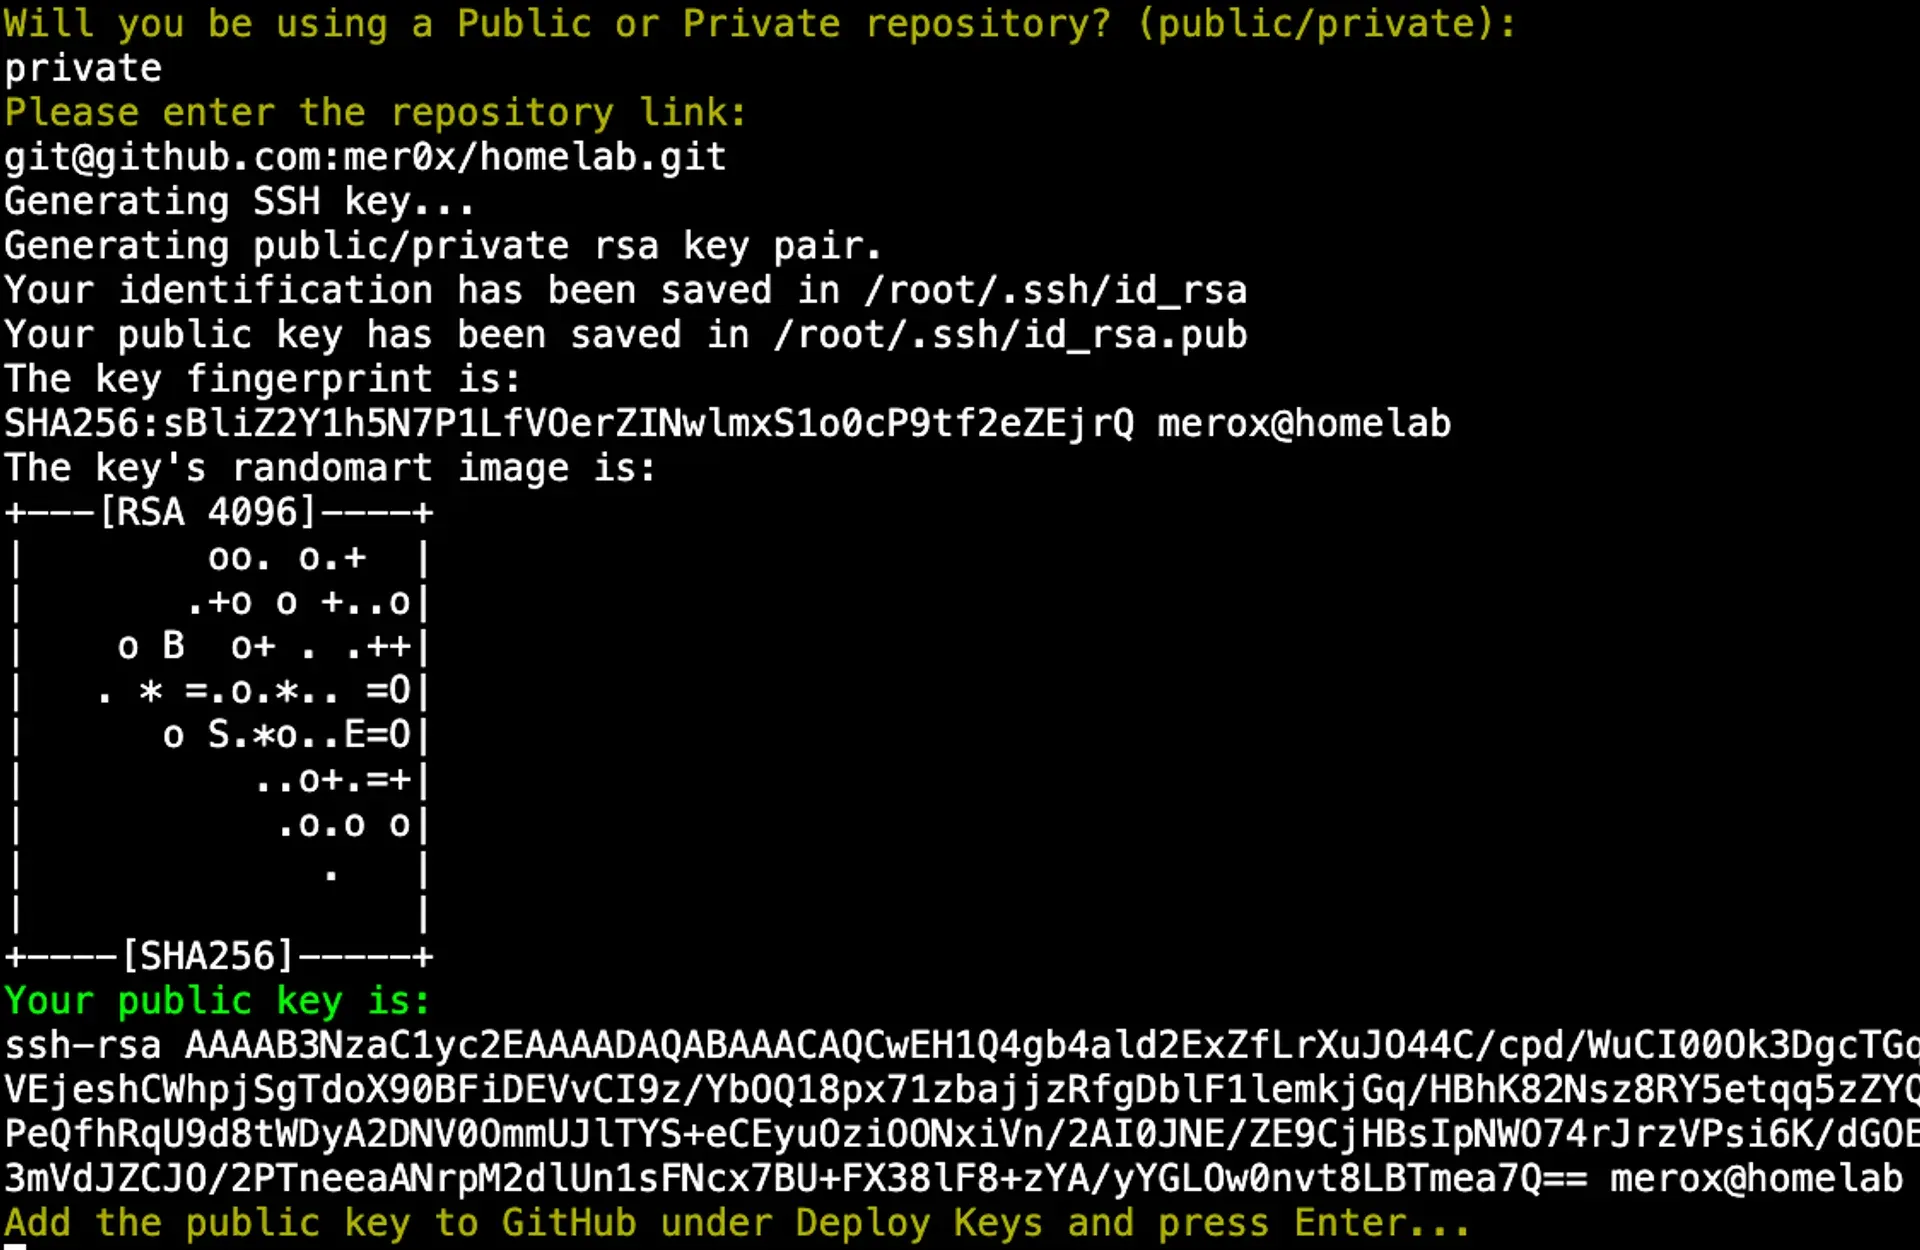
The script first asks whether your repository is public or private. For private repos, it generates an SSH key and prompts you to add it as a deploy key in your repo settings. For the public tutorial repo, use https://github.com/meroxdotdev/homelab-as-code.git directly.

Initial Prompt

Edit Confirmation Prompt

Next, it asks whether you’ve already edited the required config files. Type yes to proceed with the Packer → Terraform → Ansible pipeline, or no to exit and review the guides below first.

Downloaded config files land in /home/homelab/.

Configuration Guides

The setup is split across four subposts — go through them in order before running the script:

  1. Ansible Setup — inventory, roles, optional NFS mounts
  2. Services Configuration — Homepage, Media Stack, Traefik
  3. Infrastructure Setup — Packer and Terraform
  4. Deployment & Verification — final steps and checks

Ansible Configuration and Setup

merox merox #infrastructure#automation#ansible#homelab

Configure Ansible inventory, roles, and optional NFS mounts for homelab automation

This covers the Ansible side of the homelab automation — inventory generation, service roles, and optional NFS mount configuration.

Inventory

The inventory folder holds the inventory.ini file that maps the VM’s IP and SSH credentials for Ansible. You don’t touch this manually — Terraform generates it automatically during deployment:

resource "local_file" "ansible_inventory" {
depends_on = [time_sleep.wait_1_minute]
content = <<EOT
[docker]
docker-01 ansible_host=IP_DEPLOYMENT ansible_user=root ansible_ssh_private_key_file=~/.ssh/id_rsa
EOT
filename = "../ansible/inventory/inventory.ini"
}

Roles

The roles/docker folder contains playbooks for installing and configuring Docker, Docker Compose, Portainer, Homepage, and Traefik. Each service has its own .yml file.

NFS Mount (Optional)

If you’re mounting an external NFS share, edit roles/nfs_mount with your values.

Replace the NFS server address:

Terminal window
REPLACE_this_with_your_nfs_server_ip_address

Replace the share path:

Terminal window
REPLACE_this_with_your_nfs_path

The final line should look like this:

Terminal window
172.20.0.254:/volume1/Server/Data/media_nas/ /media nfs rw,hard,intr 0 0
Warning

If you’re not using NFS, comment out the NFS mount block in Terraform. This is covered in the Infrastructure Setup guide.

Next Steps

Proceed to the Services Configuration guide.

Services Configuration Guide

merox merox #infrastructure#docker#traefik#homelab

Configuration for getHomepage, Media Stack, and Traefik with SSL via Cloudflare

This covers the Docker service configuration — Homepage, Media Stack, and Traefik.

Homepage

No edits needed in /docker/homepage/. If you want to bring an existing config, extract the archive, drop your files in, and re-archive. After deployment, the config is available on the VM at /home/homepage/.

Media Stack

In /docker/media-stack/, update the Host rules in the labels section to match your domain or local DNS entries (Pi-hole, Unbound, Technitium, etc.):

- "traefik.http.routers.jellyseer-media.rule=Host(`jellyseer.local`)"

Replace with your domain:

- "traefik.http.routers.jellyseer-media.rule=Host(`jellyseer.merox.cloud`)"

Do this for every service in the stack.

Traefik

Two options: edit after deployment (configs land in /home/traefik/ on the VM), or extract the archive, edit locally, and re-archive before running the script.

docker-compose.yaml — replace all four occurrences of yourdomain.com with your actual domain. Provider used is Cloudflare.

.env — sets credentials for the Traefik dashboard. Defaults are user / password. Change these.

data/config.yml — optional. Use this to expose non-Docker services over SSL, like your Proxmox UI at proxmox.mydomain.com.

data/traefik.yml — replace your-cloudflare@email.com with your Cloudflare account email.

Caution

After deployment, create /home/traefik/cf_api_token.txt on the VM and paste your Cloudflare API token into it. Without this file, the Traefik container won’t start.

Start Traefik manually after creating the token file:

Terminal window
/usr/local/bin/docker-compose up &

For more on Traefik, see this detailed guide.

Next Steps

Proceed to the Infrastructure Setup guide to configure Packer and Terraform.

Infrastructure Setup: Packer and Terraform

merox merox #infrastructure#automation#terraform#packer#proxmox

Configure Packer for VM template creation and Terraform for automated infrastructure deployment on Proxmox

This covers Packer and Terraform configuration for building the VM template and provisioning infrastructure on Proxmox.

Packer

API Credentials

Holds your Proxmox API credentials. Do not commit this to a public repository.

proxmox_api_url = "https://your-proxmox-ip-or-fqdn/api2/json"
proxmox_api_token_id = "terraform_user@pam!homelab"
proxmox_api_token_secret = "your-proxmox-api-token-secret"

To generate a Proxmox API token: tutorial. More Packer examples: here.

Plugin Configuration

Plugin configuration for the Proxmox provider:

packer {
required_plugins {
proxmox-iso = {
version = ">= 1.0.0"
source = "github.com/hashicorp/proxmox"
}
}
}

VM Template Definition

Replace YOUR_PROXMOX_NODE_NAME with your Proxmox node name and YOUR_IP_DEPLOYMENT_MACHINE with the IP of the machine running the deploy script.

Cloud-Init User Data

Replace YOUR_SSH_KEY with the SSH key generated by homelab_deploy.sh.

Terraform

Credentials and Variables

Holds credentials for Proxmox. Do not commit this to a public repository.

proxmox_api_url = "https://your-proxmox-ip-or-fqdn/api2/json"
proxmox_api_token_id = "terraform_user@pam!homelab"
proxmox_api_token_secret = "your-proxmox-api-token-secret"
proxmox_host = "proxmox-host-ip"
proxmox_user = "proxmox-user"
proxmox_password = "proxmox-password"

VM Module Configuration

Replace all placeholders with your values:

  • YOUR_PROXMOX_NODE_NAME
  • IP_MACHINE — VM deployment IP
  • GateWay_IP
  • IP_DEPLOYMENT — same as IP_MACHINE
  • YOUR_SSH_KEY — generated by homelab_deploy.sh

If you’re not using NFS, comment out this block:

Warning
resource "null_resource" "run_ansible_docker" {
depends_on = [local_file.ansible_inventory]
provisioner "local-exec" {
command = "LC_ALL=C.UTF-8 LANG=C.UTF-8 ansible-playbook -i ../ansible/inventory/inventory.ini ../ansible/roles/nfs_mount/main.yml"
}
}

Other things configured in this file: locales, root SSH login, SSH key auth, and the Ansible integration trigger.

Next Steps

Proceed to the Deployment guide.

Deployment and Post-Setup Verification

merox merox #infrastructure#automation#homelab#deployment

Final deployment steps and verification for your automated homelab

Deployment Output

A successful deployment will produce output like this:

Post Deployment Console Output

Portainer Dashboard Example

Accessing Portainer

Once done, Portainer is available at port 9000 on your VM’s IP:

http://172.20.0.252:9000

Set up your Portainer user and you should see a dashboard similar to the one above.

Tip

Check your automation at least monthly to make sure everything is still running as expected.

If you run into issues, leave a comment and I’ll take a look.